Paper Sizes
This guide shows the Australian Standard of paper sizes. An ‘A0’ sheet is also referred to a ‘Flat Sheet’.
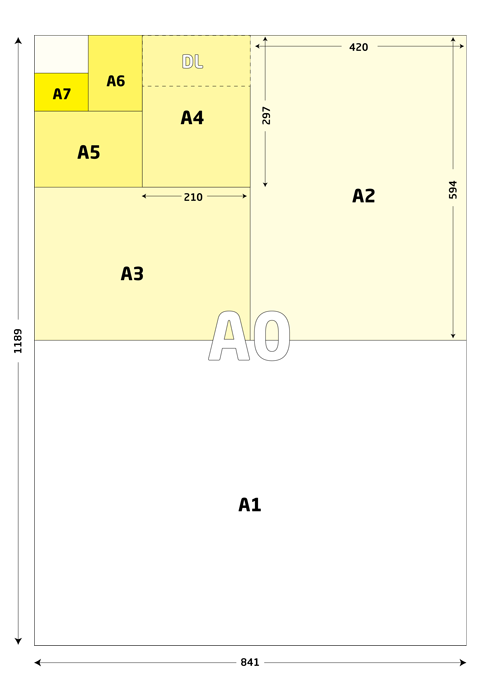
A1: 594 × 841
A2: 420 × 594
A3: 297 × 420
A4: 210 × 297
A5: 148 × 210
A6: 105 × 148
A7: 74 × 105
DL: 210 x 99
Envelope Sizes
This guide shows the Australian Standard of envelopes.

C4: 324 x 229
C5: 229 x 162
5 x 7: 180 x 130
150 Square: 160 x 160
DLX: 235 × 120
DL: 220 × 110
C6: 162 × 114
C7: 114 x 81
Setting up Acrobat DC for Pre Press
The golden rule to check if your artwork is print ready is to use Acrobat PC. Acrobat DC is a professional program that comes apart of the Adobe suite.
If you do not have acrobat pro, chances are you cannot supply artwork print ready.
The following video will show you how to setup Acrobat PC for the most common tasks.
See video:
Converting a CMYK image to PMS
If your design has a full colour bitmap image, but you need to print Pantone colours, you need to convert the RGB / CMYK image so you can assign a pantone colour. This is how to do it:

- In Photoshop, convert the image to greyscale (image / mode / greyscale). When Prompted, discard.
- Save as PSD.
- In InDesign, select the pantone colour you will be printing with.
If you have not yet selected the PMS colour you can access by:
a, in swatches panel , click "new swatch")
b, double click the new swatch
c, colour mode - select "PANTONE + SOLID UNCOATED"
d, select swatch and click "OK". - Place the PSD image in to the artboard (Ctrl + D).
- Choose the DIRECT selection tool, then select the greyscale image.
- Whilst the image is selected, select the chosen PMS colour.
- Dont forget to Check the Output Preview in Acrobat Pro to ensure file is print ready.
Converting a CMYK image to PMS WITH TRANSPARENCY
If your design has a bitmap image and you want to place it over a printed panel without showing the white background, this is how to do it:

- In Photoshop, create a new layer.
- Rename the current layer from "Background" to anything else - this unlocks the layer.
- Add a new layer under it - this should be transparent.
- The layer you renamed, remove the white / or area you want transparent).
- Follow above steps 2 through 7.
How to setup and supply a file for variable printing
Say you have a product that requires a different name on each item. This requires variable (digital) printing or overprinting. This can be done in two different methods
- Design + .CSV:
Supply the design, supply one page that shows the variable text in the correct font, size and position (keep in mind what the 'longest name' is and how it will look) + supply a .CSV file with all the variable data. Kepp in mind that one name should be per row in a single column. Artwork correction fee may be applicable
- PDF Print ready:
Supply the design as a PDF print ready (cropmarks / bleed etc) with one page per name.
IF you have been quoted 'OVERPRINT' , then only the variable data should be seen (no other printed artwork). This is common for plastic cards etc where the main product is offset printed (shell cards) then the variable names are dgitally printed over the top
Data Merge in InDesign
Indesign: Data Merge - for Digital Variable printing
If you are creating an individually customisable printed flyer or postcard, these instructions will get you on your way.
- In excel, make sure you have a title at the top of the column
- save as .csv
- Open InDesign
- Have text fields where you want to have the data,
- Format text ,then make sure field is empty
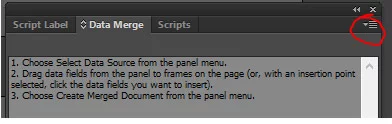
- Window / utilities / data merge
- Open panel menu
- Select data source
- Select the label you want to bring in
- Drag the label to the text field
- In data merge window - Click preview to view
- Click the right and left arrows to go through the different entries - check to ensure all fill within your text frame.
- Save file when satisfied
- Click ''create merged document'' - This will create a new document with all the entries placed in new pages.
- Save new file, name something like " - merged"


Installing Email Signature in Outlook
You have great looking email stationery, how to install it?
Please note these instructions are made for versions of Microsoft Outlook.
- Open the supplied email, select and copy all the details (Ctrl + C to copy)
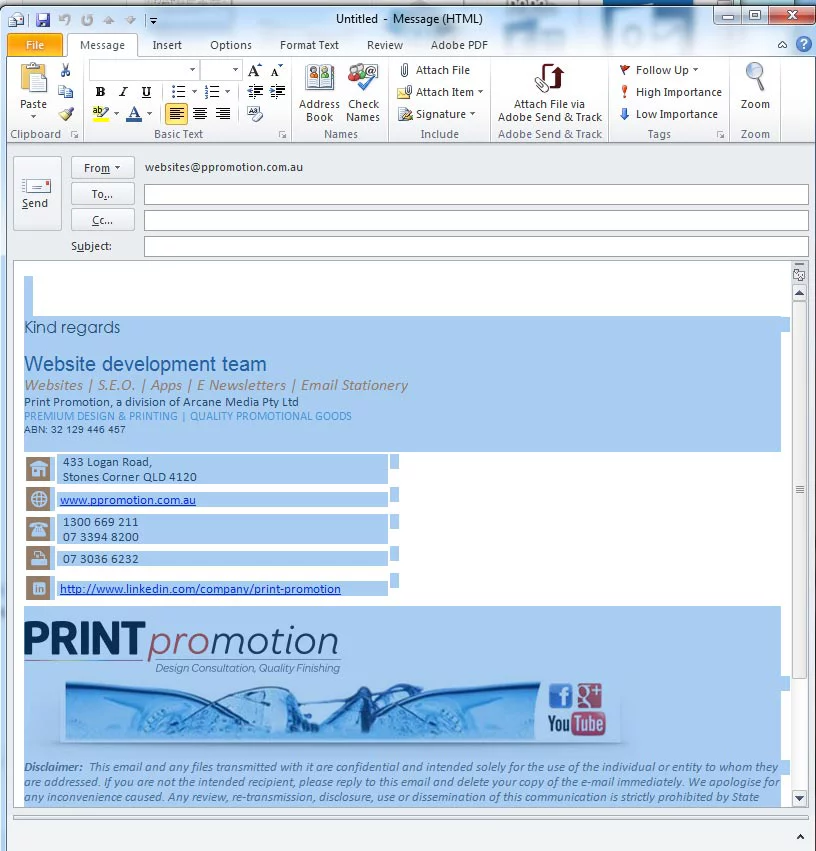
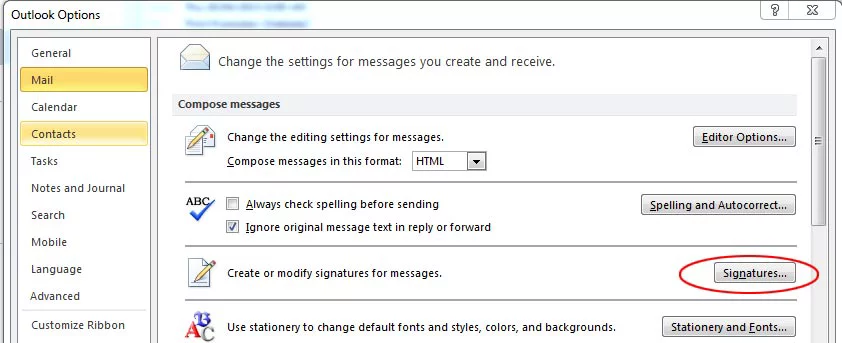
- In Outlook: File / Options / Mail / the click "Signatures" button
- In "Signatures & Stationery" window (Email signature tab):
- Select Email account
- Click "New" button
- Enter name for signature
- Assign signature to "New messages"
- Assign signate to "Replies/forwards"
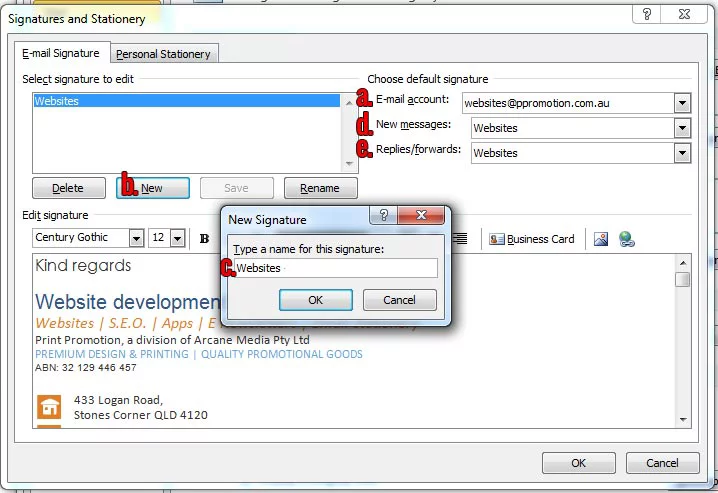
- Paste the copied signature, (from step 1). (Ctrl + V to paste) into the space below
- Click" OK" button
Print Promotion. We have been specialists in print finishing since 2009 and are happy to provide free consultation how to get the most
out your project. NO two jobs are the same, as no business is the same. As such each job should be treated with due process.
We offer first rate consultation to offer the right stock and the right finishing for your next upcoming job. The process is usually pretty quick once timeframe and budget is ascertained.
Further to this, we created this page to provide additional information regarding prepress – to ensure your artwork will turn out as intended. In addition, a comprehensive run down on all things print finishing – examples of how you can expect the product to turn out.
Who are we?
Print Promotion is a division of Arcane Media based in Brisbane, Queensland. We are a premium design and printing consultancy that specialises in creating or enhancing your visual corporate image. Our skilled team of seasoned graphic designers have the experience and marketing insight to ensure your image will effectively relate to your target demographic. We have an Australia-wide client base, servicing: hospitality and tourism; professional services; construction and trade; media; mining; recruitment; automotive; defence and the health business sectors.
Contact us today to discuss your next design or print project.
Call 1300 669 211
We design. We print. We deliver.
Chandler | Ascot | Burbank | Hamilton | Bulimba | Brookfield | St Lucia | Chelmer | Surfers Paradise | Paradise Point King | Seaforth | Malvern | Middle Cove | Castlecrag | Claremont | Swanbourne | Castle Cove | Roseville | Mosman Park | Balmain | Milsons Point | Kirribilli | Double Bay | Albert Park | Brighton | Berrimah | City Beach | Broadway Nedlands | Crawley | Dalkeith | Woollahra | Hunters Hill | Woolwich | Mosman | Dover Heights | Vaucluse | Hawksburn | Cottesloe | Peppermint Grove | Bellevue Hill | St Andrews | Darling Point | Edgecliff | Northbridge | Rindwood | Eltham | Greensborough | Camberwell | South Yarra | Byron Bay | Brunswick